The seeds of many native plants have built-in dormancy mechanisms that protect them from germinating before killing frosts or in times of drought. In the wild, seeds will lie dormant until the proper conditions for growth occur. But in cultivation, the successful gardener must become familiar with several simple pre-sowing seed treatment methods that will unlock the dormancy mechanism and stimulate quicker, more consistent germination.
We have developed the following seed germination codes to help you successfully grow the native seed sold in our catalog. These seed-treatment suggestions have been compiled from our own experience, available literature, and feedback from other growers and customers. These are only suggestions and not the definitive source of germination information. If your experience reveals successful methods other than these, please let us know.
Until you are ready to plant or apply pre-sowing treatment, seed should be stored in an open container in a cool, dry place, or in a sealed (airtight) container under refrigeration (33–40°F). Avoid rapid or frequent temperature changes and protect against rodents.
In a garden setting, sow seeds shallowly; no deeper than the width of the seed. Keep seedlings carefully weeded. Periodic watering is helpful to establish seedlings. If seed does not germinate the first year, don’t give up; germination may occur the second year or even later.
MATCH THE GERMINATION CODE(S) ON YOUR SEED PACKAGE
TO THESE INSTRUCTIONS:
A: No pre-treatment is necessary:
Seed should germinate upon sowing in a warm location. Germination code A species can be found here.
B: Hot water treatment: This hot water treatment helps break open the hard seed coat. This may happen naturally with freeze/thaw cycles, but better germination can be expected if hot water treatment is done before fall planting outside, or artificial cold-moist stratification in a fridge (Germination Code C). Germination code B species can be found here.
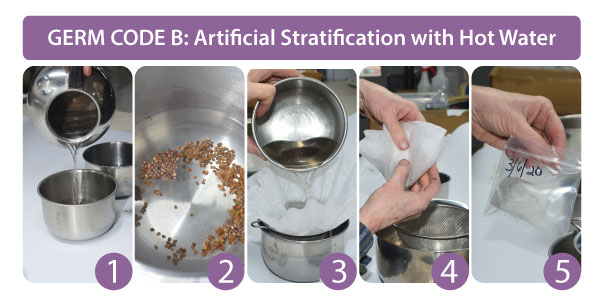
2. Soak the seeds at room temperature for 24 hours.
3. Filter through a coffee filter and fine mesh strainer.
4-5. Proceed with germination code C instructions (below).
C (# of stratifying days): Cold, moist stratification needed: To naturally stratify seed, plant outdoors late fall on a weed-free site and allow seed to overwinter. To artificially stratify seed, place seed and medium in a labeled, sealed plastic bag and store in a refrigerator (33-40°F). Stratification medium could be a damp paper towel, coffee filter, sand, vermiculite, or other horticultural-use medium.
We recommend mixing equal parts sand and seed, or slightly more sand than seed. Whatever stratifying medium you choose, be sure to moisten the mixture slowly to a damp but not wet consistency. You should not be able to squeeze any excess water out of the medium.
Stratify for the number of days indicated in parentheses. If two months stratification is required, C(60), one month may work for many species if time is a constraint. Some seeds may sprout in the storage bag. If this occurs with more than a few seeds, plant immediately. Germination code C species can be found here.
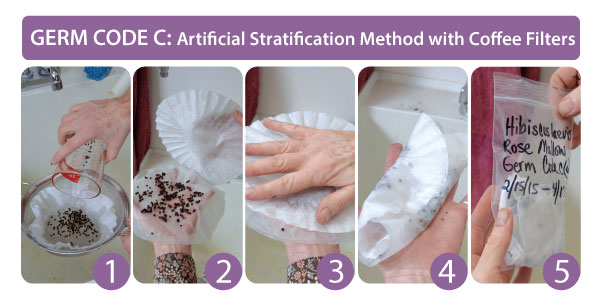
2. Arrange seed in a single layer and allow all excess water to drain off.
3. Fold seed loosely into the coffee filter or paper towel to allow for weekly spot checks. The seed and paper should be damp but not wet.
4. Add a dry paper towel to your labeled resealable bag to help to maintain even moisture while pulling excessive moisture away. Do not allow the stratification medium to completely dry out or stay soggy.
5. Place the sealed bag in your refrigerator (not freezer) and monitor weekly, or as needed, until it is time to remove for sowing. Replace coffee filter or paper towel often; repeat from step 1. Once seed has completed the recommended stratification period, or if excessive early sprouting occurs, plant immediately.
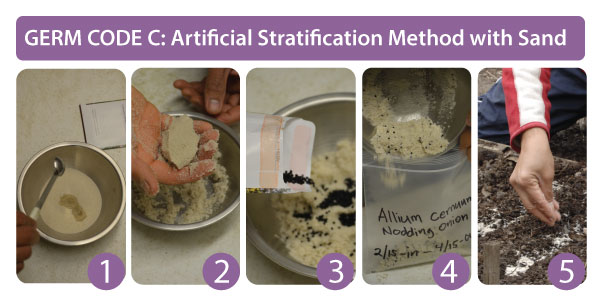
Add water. We used 1 to 2 teaspoons of water per 1/3 cup of sand.
2. Mix only enough water to allow medium to form into a ball.
3. Add your seed to the stratification sand and mix together. Our package label will indicate the suggested number of days for artificial stratification i.e. C (60) = 60 days of cold, moist conditions needed.
4. Refrigerate the seed mixture in a sealed plastic bag marked with start and finish dates. Check periodically so that the mixture does not dry out. If premature sprouting occurs, plant immediately.
5. Once cold, moist stratification is complete, sow the seed into rows when the threat of below-freezing temps has past. Keep rows well weeded and thinned.
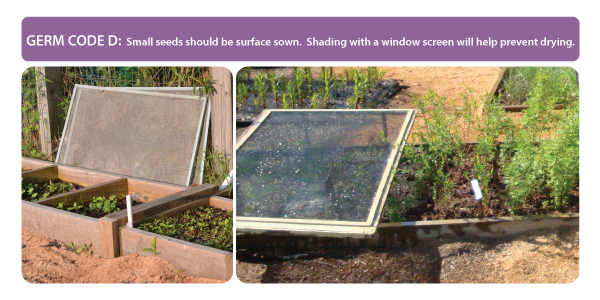
D: Seeds are very small or need light to naturally break dormancy and germinate: Seed requiring this treatment should be surface-sown. No soil cover, or just a dusting of soil, should be applied. If grown in outdoor beds, sow stratified (if required) seed on a level surface. Cover with a single layer of burlap or cotton sheet to help retain moisture at the soil surface. Remove cover after germination. Do not let soil dry out until seedlings are established. Shading with a window screen set 12” above the soil during the first season will also help prevent drying. If sowing seeds in containers, water from the bottom as necessary. Germination code D species can be found here.
E: In order to germinate, seeds need a warm, moist period (summer) followed by a cold, moist period (winter): Sow outdoors in spring and allow one full year for germination. To artificially start this stratification process, mix seeds with horticultural-use medium, place mixture in a labeled, sealed, plastic bag and store in a warm place (about 80°F) for 60–90 days. Then place in your refrigerator (33–40°F) for 60–90 days before sowing. Germination code E species can be found here.
F: Seeds need a cold, moist period (winter) followed by a warm, moist period (summer) followed by a 2nd cold, moist period: Sow outdoors and allow 2 years or longer to germinate. To artificially start this stratification process, follow the instructions for Germination Code C for 60-90 days, then store in a warm (about 80°F) place for 60-90 days, followed by a 2nd cold period in the refrigerator. Germination code F species can be found here.
G: Seeds germinate most successfully in cool soil: Sow seeds in late fall (after hard frost) or early spring. Germination code G species can be found here.
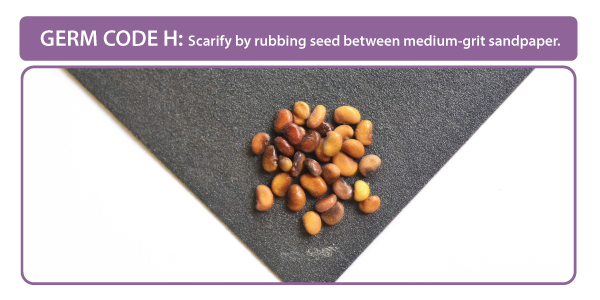
H: Seeds need scarification: These species require weakening of the seed coat in order to come out of dormancy. Scarify by rubbing seed between two sheets of medium-grit sandpaper. The goal is to abrade seed coats – stop if seeds are being crushed. Scarification should be done before stratification (Germination Code C) if needed. Fall or winter sown seed should not be scarified to prevent the chance of premature germination and winter kill. Germination code H species can be found here.
I: Legume (member of the pea family): Most legume species harbor beneficial bacteria called rhizobia on their roots. Genus-specific strains of this bacterium called inoculum can aid in the fixation of atmospheric nitrogen and improve long-term health of native plant communities. Inoculum is naturally occurring in most soils and additional amendments are not needed. However, inoculum can be purchased from us for most legume genera here.
Germination code I species can be found here.
J: We remove the hulls from these legume seeds: This gives more seeds per ounce and greatly improves germination. If you have dehulled seed from another source, treat as in Germination Code H. Germination code J species can be found here.
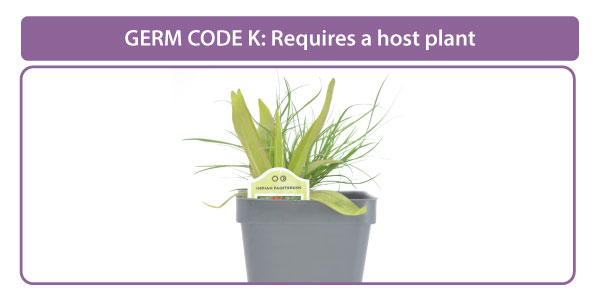
K: Hemiparasitic species which requires a host plant: Good hosts for many hemiparasitic species include low-growing grasses and sedges like Blue Grama, Pennsylvania Sedge, Little Bluestem, and June Grass. With a knife, make a 2” deep cut at the base of the host plant. Sow seed in the cut, making sure seed is not more than 1/8” deep. If host is transplanted at sowing time, the cut is not needed because damaged roots will be available for attachment by the hemiparasite. You may also try sowing hemiparasitic and host species seeds together at the same time. To add hemiparasitic species to existing sites, scatter seed on soil surface (rake in if seed is large) in late fall. Germination code K species can be found here.
L: Plant fresh seed or keep moist: Refrigerate until planting or starting other treatment. Germination code L species can be found here.
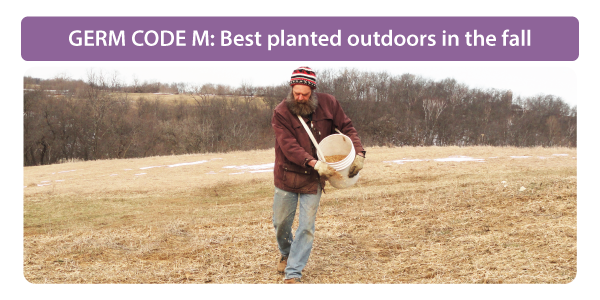
M: Best planted outdoors in the fall: Artificial stratification may not work well.
Germination code M species can be found here.
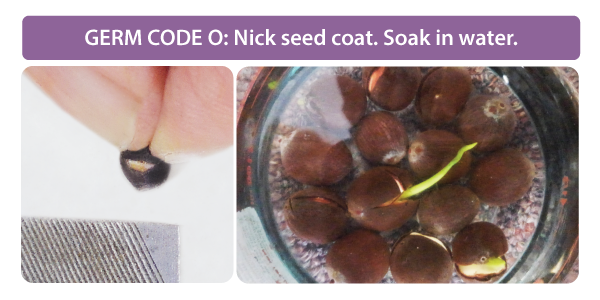
O: Impermeable seed coat: Nick seed coat with knife, and soak in water overnight before planting. Germination code O species can be found here.
?: Not sure: Your input would be of interest to us.